Usage Instructions
How to use the RNS peripheral
Default values
The RNS peripheral has, as factory defaults, assigned OBCS joystick buttons from 1 to 4 to each knob:
| Push-button | Assigned joystick button |
|---|---|
| COMM knob push-button | 1 |
| NAV knob push-button | 2 |
| ADF knob push-button | 3 |
| XPDR knob push-button | 4 |
This can be changed by the TOGA software provided.
Each instrument in your RNS have factory default values.
These values can be changed with the TOGA software very easily.
❗ Note
The RNS restore these values to factory default at power up, after every hard or soft resets.
| Instrument | Field | Default value | Integer increment | Decimal increment |
|---|---|---|---|---|
| COMM | ||||
| Active/Standby maximum frequency | 136.975 | 1 | 25 | |
| Active/Standby minimum frequency | 118.000 | 1 | 25 | |
| NAV | ||||
| Active/Standby maximum frequency | 117.950 | 1 | 50 | |
| Active/Standby minimum frequency | 108.000 | 1 | 50 | |
| ADF | ||||
| Maximum frequency | 9999 | 1 | 1 | |
| Minimum frequency | 0000 | 1 | 1 | |
| XPDR | ||||
| Maximum squawk code | 7777 | 1 | 1 | |
| Minimum squawk code | 0000 | 1 | 1 |
Powering up
When the RNS is powered by the onboard computer system, the displays start counting from 0 to 9 as a test, allowing the user to check them. Then, these are turned to ' - ' and the backlit RGBW lights on with the default color.
The default frequencies are displayed.
Your RNS is ready.
First run
Run the TOGA app. If no peripheral is declared, you'll be asked to insert one to the peripherals list.
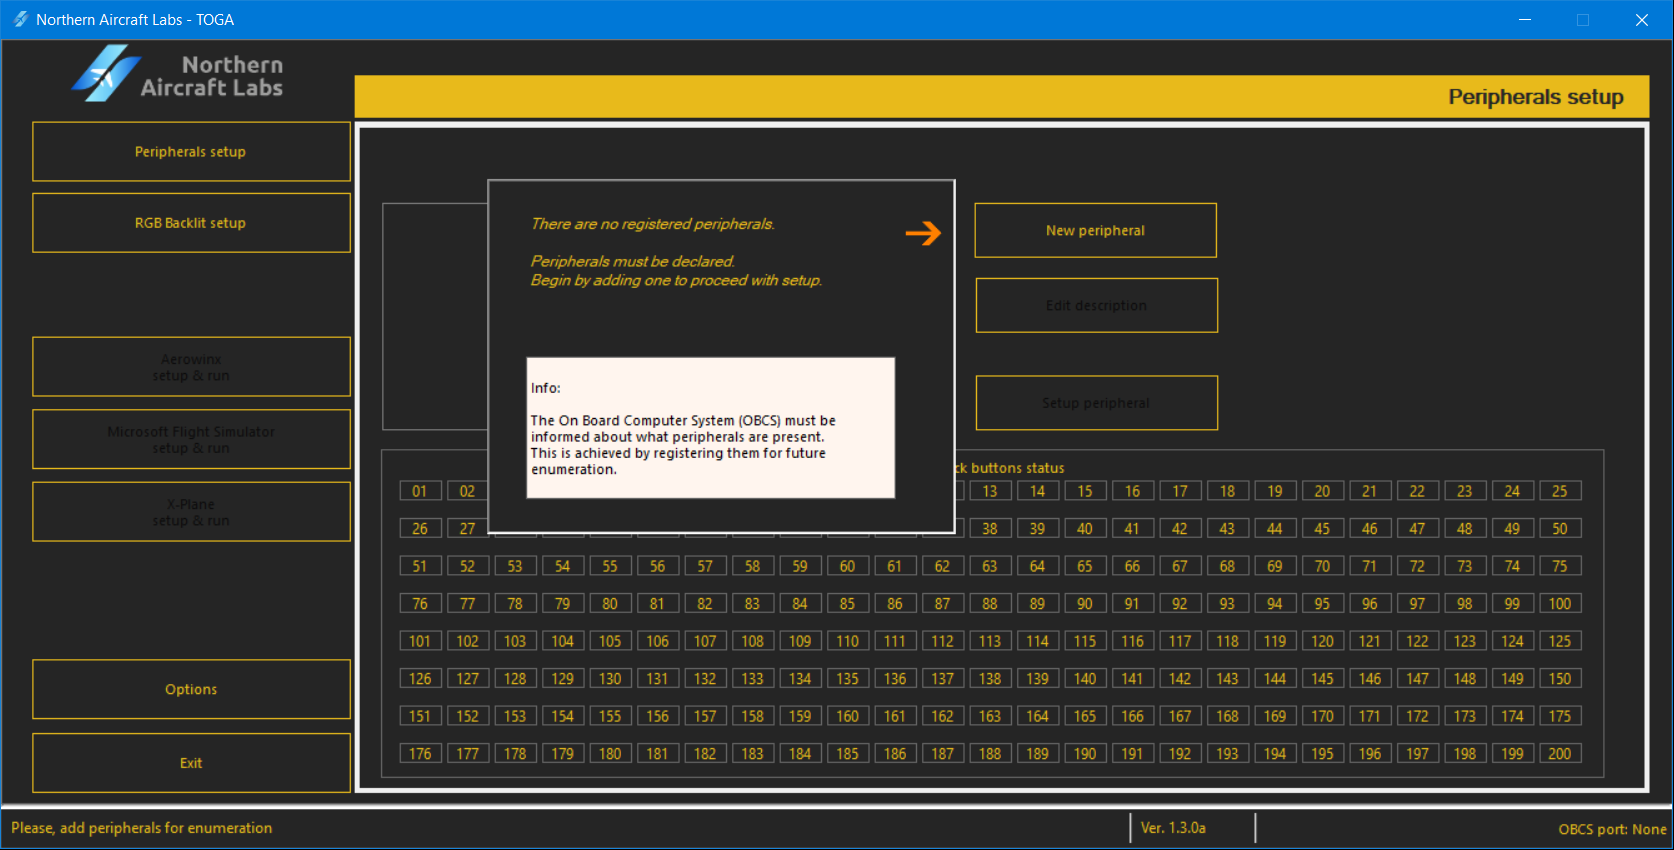
Press New peripheral.
Insert the serial number written in the plate located in the back of the peripheral. This is a 10 digit number which begins with 31. Insert, also, a description of your choice to easily be recognized. Use letters, numbers and spaces.
Confirm with Save.
Your RNS is now declared and ready to be configured.
Testing Push-Buttons of your RNS
In the TOGA app, select the first tab at left Peripherals setup.
At the bottom of this window, a joystick buttons matrix is displayed, named Joystick buttons status.
Turn ON and OFF each push-button (push down the central knob rim) and the matching joystick button will light ON or OFF.
Configuring the RNS
Run the TOGA app.
Select the first tab at left Peripherals setup.
Select your RNS from the peripherals list.
Press Setup peripheral
A new window appears to setup your peripheral.
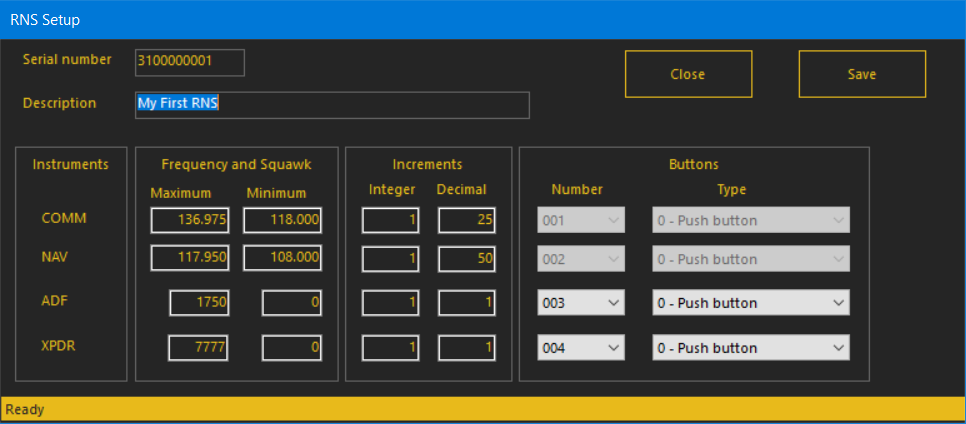
This window have panels to insert the desired values in each instrument:
- Insert a maximum value and a minimum value. This should be multiples of the increments inserted.
The ADF and XPDR are composed by two pairs of digits. For example, a 0367 frequency in ADF is internaly seen as "03" and "67" as integer and decimal parts, respectively.
-
Choose a joystick button number for each instrument push-button. Greyed inputs means no availability.
-
Select the behaviour for each push-button. For example, if one push-button is set to Toggle it will behave as such.
⚠️ Warning
If a joystick button is attributed to two or more inputs, MBx24 VICes included, unexpected behaviour may accour!
Saving the setups
On the top-right side of the window, press Save to save the peripheral configuration.
Pressing Close will close this window.
❗ Important note
Pressing Close without saving will cancel the modifications made during this set up.
Congratulations
Your RNS is now configured and ready!